Showing posts with label vegan. Show all posts

Thursday, 28 May 2026

Tofu Poke Bowl

A poke bowl is a dish that originates from Hawaii. Pronounced as ‘po-kay’, poke literally means to cut up into small pieces and originally invented as a dish comprising of raw fish, seaweed and possibly seasoned with the likes of salt and lime.

As with most dishes the world over, they are often adapted to suit the taste and trends of that particular region. The modern poke bowl became popular in Japan and using the same principles, was adapted to include raw fish or sushi alongside the likes of rice and raw vegetables.

I basically treat it as a super-healthy ‘pick and mix’ style dish that my family loves, particularly my youngest who would always choose small portions of different foods to choose from as opposed to the Northern English staple of meat and three veg. I try to balance it out with protein, carbs and vegetables, so in there often goes pretty much anything from the fridge or cupboard: tins of tuna, mackerel or sardines; leftover roasted chicken, beef or pork; pan-fried tofu; grains such as quinoa, brown rice or bulgur wheat; pulses such as lentils, black beans or chick peas; raw veg such as carrots, broccoli or cauliflower and perhaps some roasted vegetables such as sweet potatoes. The key is bringing it all together with a tasty sauce or dressing, and our go to sauce is often something hot, salty, sweet and sour using store cupboard ingredients (see recipe below).

So have fun ‘poking around’ your cupboards making your own poke bowls, experiment to your heart’s content and use the below recipe as a guide. You will find they quickly gain popularity in your house and if you get the balance right, you will find your body benefitting from some super-healthy ingredients.

Tofu Poke Bowl – Serves 4

Ingredients
1 red onion
100ml cider vinegar
1 tbsp sugar or honey
150g quinoa
Half a cucumber, cut into cubes
100g cherry tomatoes, halved
Juice of 1 lemon
4 spring onions, sliced
2 large sweet potatoes
2 blocks of 300g firm tofu
1 pack of tender stem broccoli
1 red onion
100ml cider vinegar
1 tbsp sugar or honey
2 limes
Sesame Seeds
Salt and pepper

For the sauce
1 heaped tbsp gochujang paste
1 tbsp smooth whole peanut butter
2 tbsp dark soy sauce
1 tbsp honey or maple syrup
Juice of 1 lime
1 clove garlic, grated
1 thumb size of fresh ginger, grated


Method
1 – To make sweet picked red onions, bring the vinegar and sugar to the boil in a pan. Peel, halve and thinly slice the onion then put into a small mixing bowl. Pour over the hot vinegar and sugar, season with a little salt, mix thoroughly then keep aside to cool.
2 – Cook the quinoa according to the instruction. Allow to drain and cool. In a mixing bowl, combine with the lemon juice, cucumber and tomatoes and taste for seasoning. Put aside.
3 – Pre-heat your oven to 200C/180C fan. Wash and cut the sweet potatoes in half lengthways. Rub a little olive oil onto the flesh side then place onto a baking sheet lined with greaseproof paper. Place on the middle shelf and cook for 40-minutes. Turn off the heat, open the oven door and allow to rest for 15-minutes.
4 – Drain and pat dry the tofu. Cut into cubes and heat up a little olive oil in a large non-stick frying pan. Stir-fry for 5-10 minutes until golden. Remove and keep aside.
5 – Bring a large pan of boiling water to the boil. Carefully place the broccoli in and turn off the heat. Allow to sit for 2-minutes then drain and cool immediately in a bowl of cold water with ice cubes in. Keep aside.
6 – To make the sauce, put all the ingredients into a mixing bowl and whisk thoroughly. Taste to ensure you have the right balance of hot, salty, sour and sweet and adjust to your taste.
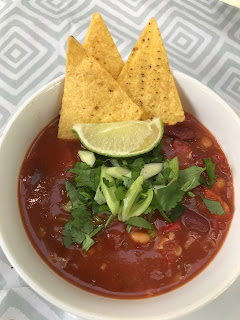
7 – Assemble your poke bowls to your liking, with a portion of each arranged around the bowl. Finish with a scattering of spring onions, pickled red onions and sesame seeds and serve with wedges of lime.

Tuesday, 22 July 2025

Peanut Choc Bites

These are a simple to make sweet treat as an alternative to some well-known peanut and chocolate-based brands, but without any nasty additives or refined sugar. Perfect for a quick energy boost before exercise, they do still contain sugar but from dried dates, and peanuts of course are calorific, so try to resist not eating them all in one sitting. Keep them in the fridge in an airtight container and they should last for a good week.

Ingredients
250g dried dates, pitted
200g unsalted roasted peanuts
100g peanut butter
200g dark chocolate (I use 80% proof but your choice. Use dairy-free if you want this to be vegan)) 
1 tbsp coconut oil (purely optional)

1 - Use a 20cm square brownie tin or similar and line with baking paper or a double layer of clingfilm.
2 - Put the dates and peanuts into a food processor and blitz for 40-60 seconds (you may need to pulse it).
3 - Add the peanut butter and pulse until combined. Pour out onto the lined brownie tin and using the back of a spoon, ladle or palette knife, press down until even and smooth.
4 - Place a heatproof bowl over a pan with a little water in (make sure the bowl doesn't touch the bottom of the pan or the water). Break up the chocolate and add to the bowl along with the optional coconut oil. Bring to a simmer and gently stir until melted.
5 - Pour over the peanut and date mixture. At this stage, you can be creative and sprinkle on a little sea salt, crushed nuts, dried fruit or a combination of them. I've kept it simple with a little sea salt.
6 - Put into the fridge to cool completely and when the chocolate is set, you can cut it up into little bite-sized pieces and keep in the fridge in an airtight container.

Saturday, 19 July 2025

Roast Tomato, Garlic and Basil Soup


Roasting all of the ingredients together not only simplifies further an already simple recipe but intensifies and locks in the flavour. Caramelising the vegetables and garlic brings out a natural sweetness. This creates a tomato soup with plenty of character and one that will quickly become your go-to family soup. Make sure to have plenty of crusty bread and good salted butter for dunking.   


Ingredients - Feeds 4

2kg fresh tomatoes
2 red onions
1 whole garlic bulb
2 tbsp olive oil
2 tbsp balsamic vinegar (or red wine vinegar) 
Salt and pepper
A handful of fresh basil
200ml hot water

1 - Pre-heat oven 200C/Fan 180C/GM6. Line an oven tray.

2 - Chop the top and bottom off the red onions, peel and slice into quarters. Place onto the oven tray.

3 - Slice the tomatoes in half and place amongst the onions. Then cut off the top of the garlic bulb exposing the cloves and place in the centre.

4 - Drizzle over the olive oil and balsamic vinegar, give it a good seasoning with salt and pepper and roast on the middle shelf for 30-40 minutes until just beginning to char.

5 - Remove from the oven and take out the garlic bulb. Tip the rest - including all the juices - into a pan and add the water and fresh basil. Then squeeze the roasted garlic cloves in. Using a stick blender, blend until smooth then taste for seasoning. You may need to add more salt and pepper and a little more vinegar. A pinch of chilli works well too.
6 - Bring to the simmer, check for flavour again then serve with crusty bread, butter and a little torn fresh basil.

Wednesday, 16 July 2025

Pickled Red Onions

These pickled onions (and cucumbers too) are amazing with cheese, salads, in sandwiches or our favourite, on tacos. So much better than shop bought (as you control the flavour) and surprisingly easy. Just make sure you save those old jam jars and sterilise them properly by giving them a proper scrub then either boiling for 10-minutes in a pan (along with the lids) or putting into an oven set at 160C for 10-minutes. 

This makes one small jar, so if you have bigger jars, just increase the ratio. 

1 - Thinly slice 3 red onions and place into a colander. Pour over boiling water straight from the kettle and leave aside to cool.

2 - In a pan, add 300ml of white wine or cider vinegar, 2 tbsp brown sugar, 1 tbsp salt then your flavourings of choice: I used 6 peppercorns, 1 star anise, 2 bay leaves and a tsp mustard seeds. Like it hot? Add a couple of chillies. But leave them out if you want it plain and simple. 

3 - Bring to the boil then simmer for a minute and take off the heat.

4 - Pack the red onions into a sterilised jar. Pour over the pickling liquor to the top, put on the lid firmly and keep aside until cool. You can keep them unopened in the fridge for 6 months or consume within 2 weeks after opening. Remember: the flavour develops with time.

NOTE - For pickled cucumbers, thinly slice half a cucumber and repeat exactly the same method. 

Tuesday, 1 March 2022

Mexican Bean Soup


Ingredients - Feeds 4

2 tbsp olive oil
4 spring onions, sliced
2 sticks of celery, diced
1 red pepper, chopped
2 cloves of garlic, sliced
2 tsp ground cumin
2 tsp ground coriander
1 tsp cocoa powder
Half tsp ground cinnamon
A pinch of dried chilli flakes
2 tbsp tomato puree
1 tin each of kidney beans and haricot beans
1 tin of chopped tomatoes
400ml vegetable stock
Salt and pepper

To serve
A handful of chopped fresh coriander
3 spring onions, sliced
Lime wedges
Tortilla chips

1 - Heat the oil in a large pan. Add the spring onions and celery and soften without colouring.
2 - Add the garlic, spices, cocoa and tomato puree, stir in and cook for 1 minute.
3 - Tip in the beans, tomatoes and stock, bring to the boil then simmer with the lid slightly off for 20 minutes.
4 - Taste for seasoning then serve with fresh coriander, spring onions, lime wedges and tortilla chips.

Wednesday, 9 September 2020

Sweet Potato and Coconut Dahl


This is a bit of a mishmash of a traditional and much loved Indian Dahl with the coconut and lime of south Indian food. I used green lentils but you could use red or brown, even yellow split peas. Either way, you are left with a very delicious, spicy and creamy curry that needs flat breads to mop it up as opposed to rice.

Sweet Potato and Coconut Dahl

Ingredients - feeds 4

200g green lentils, cooked according to instructions (or used tinned)
One large sweet potato, peeled and cubed
3 tbsp groundnut or sunflower oil
1 onion, diced
3 cloves of garlic, crushed
1 tsp cumin seeds
1 tsp turmeric
1 tbsp ground coriander
1 tbsp garam masala
1 stick of cinnamon
1 tsp chilli powder
2 whole chillies
1 tin of chopped tomatoes
1 tin of coconut milk
Salt and pepper
Juice of 1 lime
Chopped spinach and coriander

1 - Heat the oil on a large, deep non-stick pan. Add the cubed sweet potato and stir fry for 10-15 minutes until coloured and beginning to soften.
2 - Stir in the onion and garlic and cook for 5 minutes until beginning to colour and soften.
3 - Add the spices and chillies and cook, stirring, for 1 minute. Tip in the tomatoes and coconut and season well with salt and freshly ground pepper.
4 - Stir in the cooked lentils and simmer for ten minutes until everything is warmed through and the sweet potato fully cooked. Add the juice of the lime and serve with flat breads, fresh spinach and coriander.

Friday, 27 January 2017

Courgette Pakora

If you are like me and adore Indian food, you might understand the one issue that I have with it.

When entering an Indian restaurant I'm usually hungry on the verge of cannibalism. I scan the starters and mentally choose everything on there, before settling for one with a mound of popadoms and a pickle tray. I then proceed to eat it too fast that the next thing I know, I'm picking over the main course.

The point I'm trying to make is that I love Indian starters: samosa, pakora, bhaji, aloo chaat, Seekh kebab. You name them, I devour them. So much so that I would actually prefer to just have a table full of them and nothing else.

So this week I turned my hand to transforming a few courgettes into pakora, that little bundle of Indian spiced batter and vegetable that crisps to perfection and pops perfectly into a hungry gob. They could not be easier to make and the best thing about it is you can make a table full of them with ease using a variety of vegetables. Everything from onion, courgette, aubergine and carrot works. Just remember to get out as much water as you can before frying to ensure crispiness.

Courgette Pakora

Makes lots

3 courgettes, grated
100g chick pea flour
Half tsp baking powder
1 tbsp garam masala
1 tsp turmeric
1 tsp ground cumin
1 tsp ground coriander
1 tsp chilli powder
Salt and pepper
Fresh coriander, chopped
Vegetable oil

1 - Put the grated courgette into a tea towel and squeeze thoroughly to get as much water out as possible.
2 - In a bowl, tip in the flour, spices and seasoning. Whisk in enough water to form a paste the consistency of double cream and coats the back of a spoon; not too thick, not too thin. Stir in the courgette and fresh coriander.
3 - Heat up a deep frying pan with vegetable oil. Test a pakora out by dropping in a small teaspoon if the batter. If it immediately begins to fry and turns golden in a minute, the oil is hot enough. Taste for seasoning.
4 - Fry heaped teaspoons in batches, draining on kitchen paper. Serve with fresh coriander and an accompaniment of yoghurt, pickles and/or chutney.

Tuesday, 24 January 2017

Chermoula (Moroccan Marinade)

This is a very easy to make but stunning marinade or paste for use with chicken, pork and fish. Used extensively in North Africa in countries such as Morocco or Tunisia, it's a cheeky blend of spices, lemons, chilli, garlic and fresh coriander and adds a punch of flavour to pretty much any grilled or pan-fried meats. You can even try it with hardy roast vegetables such as squash, beetroot and potatoes.

I like to use mine with fresh tuna, seared perfectly on the BBQ or a griddle pan and served with bulgar wheat, cous cous or quinoa. Toss in a few pomegranate seeds and things become even more exciting. Try it.

Chermoula 

4 tbsp olive oil
2 tsp each of ground cumin and paprika
1 tsp ground cinnamon
Juice and zest of one lemon
2 garlic cloves, crushed
Either 1 fresh deseeded chilli finely chopped or 1 tsp ground chilli
A couple of handfuls of fresh coriander, roughly chopped
Salt and pepper

1 - Combine all of the ingredients thoroughly in a mixing bowl. Taste for seasoning.
2 - Add your choice of meat and leave to marinade for a few hours. Cook as normal.

Friday, 20 January 2017

Harissa Sauce

We've recently been turning to ways of transforming otherwise bland leftover food into something amazing. In our fridge there are always airtight containers with last night’s rice, pasta, cooked vegetables, fish or meat in. Waste not want not is the mantra.

A great way of making, say, a load of cooked vegetables and cooked pasta taste good is to whack it all into a casserole dish, cover it in a good tomato sauce (hopefully one that you have made and stored in the freezer) top with a cheese sauce and cook until golden and bubbling. Or take your rice and combine with leftover chicken, lemons, cardamon and cinnamon and bake in foil for a lovely quick 'leftover pilaf'.

I like to make sauces such as salsa verdé or 'green sauce', a strong, piquant sauce made from store cupboard ingredients that transform the blandest of meals into a thing of pleasure and beauty. A close second to that is harissa, a fiery North African sauce of red pepper and chilli that is so easy to make yourself and again, transforms the boring into the beautiful. Try it with fish or white meats, rice and salad. Make the most of your own little store in your kitchen and soon you will be a master of the leftovers.

Harissa Sauce

2 red peppers
1 large or 2 small red chillies, deseeded
1 garlic clove, peeled
1 tsp coriander seeds
1 tsp cumin seeds
1 tsp paprika (smoked or unsmoked)
Juice of 1 lemon
3 tbsp olive oil
Salt and pepper

1 - If you have a gas hob, light 2 rings and place the peppers straight onto the flame. Using tongs, turn regularly until the skin is black all over. Pop into plastic food bags, seal and leave to cool. If you don't have a gas hob, rub in a little olive oil and roast in a hot oven until collapsed. Again, place into the food bags, seal and allow to cool.
2 - Once cooled, peel off the skin and discard the stalks and seeds. Pop into a food processor along with the chillies and garlic.
3 - Put the coriander seeds and cumin seeds into a dry frying pan and pan roast for 2 minutes until fragrant. Bash in a pestle and mortar or put into a couple of food bags and bash them with a rolling pin. Add to the food processor along with the paprika and lemon juice. Blend until smooth. Taste for seasoning.
4 - Pour into an airtight jar and top with the olive oil. This will keep for a couple of weeks in a fridge.

Monday, 16 January 2017

Roast Pumpkin, Chick Pea and Garlic Soup with Golden Salt and Pepper Pumpkin Seeds


This soup entails sticking everything onto a baking tray, roasting it for half an hour in a hot oven, tipping it into a blender with a little stock or water then puréeing it into a soup. Can anybody tell me that this is difficult? If you think so, please give it a go.

Roast Pumpkin, Chick Pea and Garlic Soup with Golden Salt and Pepper Pumpkin Seeds

Feeds 4

1 small to medium pumpkin or butternut squash, cut into large chunks with seeds removed and kept aside
1 whole onion, peeled
1 bulb of garlic, broken and cloves left whole
1 tsp ground cumin and/or caraway seeds
1 tin of chick peas
2 tbsp olive oil
Salt and pepper
750ml vegetable stock

1 - Pre-heat your oven to GM6/200C.
2 - Place all of the vegetables on a baking tray. Scatter with the mixed spice, a little salt and pepper and olive oil and mix thoroughly. Roast on a high shelf for 30-40 minutes until golden.
3 - In the meantime, scatter the seeds onto another baking tray with salt and pepper and a drizzle of olive oil. Toss together then place on the middle shelf of the oven. Cook until golden.
4 - When the vegetables have cooked, cut the pumpkin skin off and place the flesh into a blender along with the onion and the garlic cloves, squeezed straight out of their skins. Pour in the stock and chick peas then blitz to a fine purée. Taste for seasoning.
5 - Pour into bowls and serve with a scattering of delicious, nutty golden pumpkin seeds.

Sunday, 31 May 2015

Gluten and Dairy Free Lemon Rice Cake

Wheat AND dairy free cake - it must be disgusting yes? Well, give this one a go and you will be eating a light, moist and utterly delicious cake that lacks none of the quality of a wheat and dairy packed cake. Amazing. Thanks to Great British Chefs for this one.

Gluten and Dairy Free Lemon Rice Cake

3 large eggs, separated
Half tsp white wine or cider vinegar
100g caster sugar plus and extra tablespoon
A pinch of salt
65ml sunflower oil
The zest of 3 lemons and the juice of 2
110g ground rice or rice flour
Half tsp baking powder

For the topping
150g lactose-free cream cheese
50g icing sugar
Zest and juice of 1 lemon

1 - Pre-heat the oven to 180C/GM4 or 160C/GM3 for a fan oven. Grease a 21cm loose bottomed cake tin with oil and line.
2 - Whisk the egg whites with a pinch of salt to soft peaks then tip in a tbsp of sugar and whisk to stiff peaks. Whisk in the vinegar and set aside.
3 - In a large bowl, whisk together the egg yolks, lemon zest and juice, oil and remaining sugar. Sift over the ground rice or rice flour and baking powder and thoroughly fold together.
4 - Tip in half of the beaten egg whites and quickly fold together. Tip in the remaining egg whites and gently fold together.
5 - Tip into the prepared cake tin and bake on the middle shelf for 40 minutes or until an inserted skewer comes out clean.
6 - Allow to cool in the tin then remove. Here's the optional bit (as it contains the dairy!) - Beat together the topping ingredients and spread over the top or simply sift over some icing sugar.

Wednesday, 30 July 2014

Wild Nettle Pakora

I've grown to respect the nettle recently. Touch one and it has the power to numb a finger or two for several hours. But that isn't the reason for new-found respect; it is simply because I like eating them.

Nettles are packed full of iron and minerals and treat carefully, they are a welcome replacement for spinach in a curry or to be made into a soup.

My favourite way with nettles is to make Indian pakoras, all spicy, crispy, mysterious and green. They are a doddle to make and amazing to eat, even my 6 year old loves them. So next time you are tutting at the nettles in your garden, just don the gloves and pick off all of the tops of the nettles and use them in your recipes. Delicious.

Wild Nettle Pakora
Makes lots

1 large colander full of young nettle leaves
300g chickpea flour (I sometimes used rice flour, it's a little more dense)
1 tsp garam masala
Half tsp ground tumeric
Half tsp ground chilli powder
Salt and pepper
Vegetable or sunflower oil

1 - With gloves on, carefully pick through the nettles discarding any tough or bruised leaves. Wash thoroughly in a sink full of water.
2 - Pick the leaves up and put them straight into a deep pan. Turn up the heat and cook until wilted. Allow to cool, squeeze out excess water then roughly chop.
3 - In a mixing bowl, stir together the flour, spices and seasoning. Add the wilted chopped nettles. Stir in enough water to make a thick batter.
4 - Heat up the oil in a deep pan. Test by dropping in a little batter. Add teaspoons of the batter mixture and cook in batches until golden and crisp. Remove and drain on kitchen paper.
5 - Serve either as a snack with mango chutney or as an accompaniment to a curry.

Saturday, 1 December 2012

Carrot, Lentil and Orange Soup

A soup that takes 30 minutes from slicing to serving. Fresh and vibrant with the addition of paprika and just a hint of chilli, the orange adds an unusual but welcome zesty kick.

Carrot, Lentil and Orange Soup
Feeds 4

1 tbsp olive oil
1 onion, chopped
4 carrots, peeled and grated
1 tbsp tomato puree
1 tsp paprika
A pinch of ground chilli
4 large handfuls of red lentils
750ml vegetable stock (fresh or from cube)
Juice squeezed from an orange
Salt and pepper

1 - Heat the oil in a pan. Add the onion and carrot and cook slowly for 10 minutes without colouring.
2 - Add the tomato puree and spices and stir through, cooking for 2 minutes.
3 - Add the lentils and stock, bring to the simmer and cook for 15 minutes.
4 - Blend to your preference (I prefer a bit of texture). Squeeze in the orange juice, taste for seasoning and serve.

Tuesday, 29 November 2011

Sticky Sweet and Sour Peppers

This recipe is one of those I always keep handy in my little head of culinary delights for when a vegetable accompaniment for anything is required and time is against me. As long as you have some peppers, garlic and a few store cupboard ingredients, you can have some delicious sticky sweet and sour peppers in minutes.

These are perfect with a simple piece of fish or chicken, but are an equal delight on a piece of toast for a quick veggie lunch.

Sticky Sweet and Sour Peppers
Serves 2 on toast or as an accompaniment

2 peppers, I use red and yellow, sliced into thin slivers
2 tbsp olive oil
2 cloves garlic, sliced
1 tbsp muscovado sugar
2 tbsp balsamic vinegar
A pinch of chilli flakes
Salt and pepper

1 - In a non-stick frying pan, preferably with a lid, heat up the oil until very hot. Lower in the pepper slices and cook for 5 minutes with the lid on, removing now and again to give it a good stir. You are looking to get them broken down and caramelised as soon as possible. Don't worry if any begin to look slightly charred, this will just benefit the flavour.
2 - Once caramelised, remove the lid and quickly stir in the garlic.
3 - Stir in the sugar, vinegar, chilli and a good grinding of black pepper and cook for 1-2 minutes until it starts to look nice and sticky and reduced. Taste for seasoning, it may need a pinch of salt.

Saturday, 19 June 2010

Lettuce and Mint Soup

It's been a 'trial and error' year of growing so far in 2010. The allotment that masqueraded as a council tip is now up and running and bearing some resemblance to an allotment. It may not win any awards, but there are things growing out of the ground that we can actually eat as opposed to want to throw in a skip.

One of the first things I planted as seedlings were a whole host of lettuce, and by far and the most prolific to be coming to maturity are the majestic Cos or Romaine lettuce. We have been eating the long slightly bitter leaves for a couple of weeks now in an effort to keep it under control, which is no bad thing.

If you have never tried lettuce in soup form I urge you to give it a go. A whole Cos went into a simmering pot of stock with potatoes, onion and garlic and a handful of new mint to produce a smooth summer soup bursting with freshness and subtle flavours. And it took all of 20 minutes from chop to slurp.

Lettuce and Mint Soup
Feeds 4

1 onion, chopped
1 clove of garlic, sliced
2 tbsp olive or rapeseed oil
6 small new potatoes, peeled and chopped in half
500ml vegetable stock
1 Cos lettuce, roughly chopped
1 handful of mint, roughly chopped
Salt and pepper

1 - Heat the olive oil in a pan and add the onion and garlic. Cook until softened.
2 - Add the potatoes and stock and bring to the boil. Simmer for 10 minutes until the potatoes are soft.
3 - Add the lettuce and mint and stir through for 1 minute.
4 - Blend until smooth and taste for seasoning.

Monday, 3 May 2010

Wild Garlic Bhajis

It's that time of they year when the bizarre smell of garlic hits your nostrils when walking through woodland. Each year I completely forget that my favourite free food is available in large quantities in British woodland. 

Wild garlic, or ramson, is much milder that the commercial bulb that we are used to, therefore it is perfect for giving your food a hit of flavour. A simple soup with potato is perfect for this delicate herb. Or bash it up with a little lemon and olive oil and it becomes a superb rub for a roast chicken.

It is also a great addition to some spiced batter, which can be dropped into hot oil for some simple homemade bhajis. So please do remember to responsibly pick a few handfuls if you see or smell some next time you are walking. It is free and delicious, just like some of the best things in life.

Wild Garlic Bhajis

Makes Lots

200g rice or chickpea flour (plain flour will be fine)
2 tbsp garam masala
Half tsp turmeric
1 tsp chilli powder
Salt and pepper
Soda water (plain water will do)
2 large handfuls of wild garlic, washed
Vegetable or sunflower oil

1 - Place the flour, spices and seasoning in a mixing bowl. Pour in the water and whisk until you have a batter that is reasonably thick but still wet enough to mix in the wild garlic.
2 - Roughly chop the wild garlic then stir into the batter.
3 - Heat a good few inches of oil for deep-frying in a pan. Drop in a piece of bread and if it turns golden brown within a minute, it is ready.
4 - Carefully place tablespoons of the mixture into the pan and fry for 5 minutes or until the mixture has turned golden brown. Cook in batches and drain on kitchen towel.

Sunday, 13 September 2009

Wild Fruit Jam

A day of plundering this weekend, and what a plunder it turned out to be. We sneaked over to our 'secret' sloe berry location anticipating disappointment after last year's wash out. And there before our eyes were bush after bush of the acrid berry that somehow transforms gin into liquid gold and, quite possibly, my favourite drink.

After plucking several kilos of sloes, the trip home became bonus time as we came across damsons aplenty. A quick shake of the branches and it rained wild plums onto our heads. Nature has more than made up for last year's harvest drought.

It helps to have a few little ones in tow when it comes to gathering fruit. Make sure they have some protective gloves on and away you go. With elderberries and brambles being thrown into the mix too, we eventually came home with more fruit than you can, erm, shake a tree at.

The sloe gin can wait until next week but the other wild fruit went into the pot for some loose jam ready for the yoghurt and muesli, porridge, hot muffins and one or two cakes and scones. There is something uniquely satisfying having made something almost for free and that pleasure doubles when you can have fun with your friends and family during the process. Happy days...

Wild Fruit Jam

Makes one large jar

1kg of wild fruit such as damsons, brambles, elderberries and sloes
200g caster sugar

1 - Put a couple of clean jars with the lids off into a hot oven and heat through for 10 minutes. Turn off the oven but leave in to remain hot.
2 - Place a couple of saucers into the freezer. 
3 - Put the fruit and sugar into a pan and bring to the boil. Give it a stir then fast boil for 10 minutes. Take a saucer out of the freezer and drop a little of the jam onto it. Put in the fridge for a minute then remove. Push it with the tip of your finger; if it crinkles, it's ready. If not, fast boil for another 5 minutes then repeat until ready.
3 - Carefully remove the hot jars with gloved hands then push the jam through a sieve into the jam jars (if you don't mind the skin and seeds, don't bother). Secure the lids and once cool, refrigerate. The jam should keep for 4 weeks.

Friday, 30 January 2009

White Turnips with Hazelnuts, Thyme and Lemon

Here's a little amusing task for you. Get a turnip and a swede then walk up to random people in the street and ask them if they know which one is which. You will probably get a lot of strange looks, certainly people running away from you and most likely the possibility of being arrested. But when you do get answers, the chances are that an awful lot of people will get it completely wrong.

I grew up thinking a swede was a turnip and vice versa. Despite mashed swede (the orange stuff) always being either on the Sunday dinner or crudely chopped into tiny cubes and boiled to smithereens on the school dinners, a little part of my tiny mind still could not distinguish which was which. And judging by the tests I have done when I'm in a 'Is it a swede or a turnip?' mood, the British public have the same problem.

In these days of food obsession and the fact that I have a responsibility to teach people about food in my everyday job, it is a culinary stumbling block I have had to get right. Swedes are the larger orange fleshed variety and called 'neeps' up in bonny Scotland. Turnips are generally the smaller white fleshed variety with a light purple tinge to their skin. Got that?

I managed to get some British baby white turnips this week which was surprising for this time of the year. But no complaints as these small, sweet and delicate vegetables are a true treat that with the right attention can be transformed into a complete dish on their own. My turnips are given royal treatment with the addition of roasted hazelnuts, thyme and lemon and just a hint of garlic to allow the vegetable's natural pepper heat to shine through. If you get some with their luscious green tops complete, wilt them in the pan as you are finishing them off to give you the complete dish. If you can't be bothered to cook them, a few thin slices added to a salad adds a welcome crunch and heat.

So get your swedes and your turnips the right way around. Both are quite the most amazing vegetable in their own right and certainly vegetables that should be promoted to higher status on the British dinner plate. Of course, I could be wrong and I could be right.

White Turnips with Hazelnuts, Thyme and Lemon
Feeds 2 as a lunch or 4 as a side dish

6 baby white turnips
2 handfuls of whole hazelnuts
25g butter
1 small clove of garlic, sliced thin
A handful of fresh thyme, leaves stripped from the stalks and roughly chopped
The juice of 1 lemon
Salt and pepper

1 - Cut off any leaves from the turnips and roughly chop and set aside. You can leave the skins on small white turnips but if you prefer, peel and cut into medium chunks. Bring a pan of water to the boil and add the turnips. Boil for 5 minutes - you want a bit of bite to them - then drain and set aside.
2 - Bash your hazelnuts up into pieces, not too small. Heat up a frying pan and add the hazelnuts. Gently toss them until toasted but be careful as they will burn easily.
3 - Add the butter to the pan and melt. Add the garlic and thyme along with the cooked turnips and gently toss until coated. Squeeze in the lemon juice, grate in some black pepper and taste for seasoning. If you have the leaves left, toss them in and cook for a few seconds until wilted.

Wednesday, 17 December 2008

Warming Three Root and Coriander Soup

'Tis the season to be jolly, but I’m sad to report that it has been far from it in our family household. With December being a fine combination of illness, injury, damaged cars and various other misdemeanours, I could be forgiven for being the ultimate Scrooge coming into the week before Christmas.

Thankfully we are all bringing ourselves around. My daughter, the cause of the various ills due to her new favourite pastime since starting nursery, Pass the Germ Parcel, appears to have the cheeky glint back in her eye and the bounce back in her step. My wife ploughs on into the storm with the strength that the female of the species only possess. And I still moan on a daily basis, but I can see the Christmas light at the end of the December tunnel. Man flu - need I say more?

Soups play a big part of any revival in our kitchen, and with cheap roots everywhere at this time of the year it is amazing what kind of super soups you can achieve with a bit of experimentation. Some old carrots, half a squash, a parsnip and a potato were the main ingredients for this winter warmer.

Blended with warming chilli and ginger and flecked with coriander, it makes for a nice alternative to the popular carrot and coriander. A squeeze of lime and a swirl of yoghurt adds sharpness to the heat and completes an otherwise impressive but simple soup, one that just about bent the corners of my mouth into some form of smile. Here's to the build up to Christmas, I can’t wait.

Warming Three Root and Coriander Soup

Feeds 4

1 onion, sliced
1 clove of garlic, sliced
1 fresh of dried chilli, chopped or crumbled
1 thumb size of ginger, peeled and sliced
4 carrots, peeled and sliced
1 parsnip, peeled and sliced
Half a large or 1 small butternut squash, peeled, deseeded and sliced
1 large potato, peeled and sliced
2 tbsp olive oil
1 litre hot vegetable stock
1 large handful of fresh coriander, roots and leaves
100ml natural yoghurt
Juice of 1 lime (optional)
Dried chilli for garnish

1 - Heat the oil in a large saucepan. Add the vegetables including the chilli, garlic and ginger and cook, stirring, for 5-10 minutes until they start to soften.
2 - Pour in the hot stock, bring to the boil and simmer for 20 minutes.
3 - Pour into a blender and blend until smooth. Put in the fresh coriander and yoghurt and blend until the coriander has broken up into small pieces rather than completely broken up.
4 - Taste for seasoning then stir in the lime juice. Pour into bowls and garnish with a sprinkle of dried chilli and a spoonful of yoghurt.

Tuesday, 22 July 2008

New Potatoes, Rocket Green Sauce and Field Mushrooms

I've been getting a bit of grief of late from some of my vegetarian readers. Not enough vegetarian recipes apparently. In my experience, vegetarians aren't ones to argue with; the lack of protein in their diet makes them a feisty lot.

Before anybody thinks I'm now turning into a vegetarian bating carnivorous fool, please relax. I've worked it out that approximately 60% of my weekly diet is made up of vegetarian meals and snacks. And looking at my recipes in the drop down column, there are loads of recipes there to appease my veggie friends. So I won't feel guilty.

My philosophy on food is that no matter what it comprises of, it should be tasty and simple to achieve. Vegetarian options on the high street can often be predictable and bland, almost an insult. So using one of the brilliant and innovative Helen Grave's recipes as inspiration, here is a winner of a meal for all my 'anything with a face won't be consumed' readers. Lip smacking green sauce smothered hot new potatoes and that meat of the vegetarian world, the field mushroom to give some variation to an incredibly simple but satisfying dish.

New Potatoes, Rocket Green Sauce and Field Mushrooms
Feeds 2

4 handfuls of new potatoes
4 large field mushrooms, sliced
2 tbsp olive or rapeseed oil

For the green sauce
4 handfuls of rocket
A handful of basil
Juice of 1 lemon
1 clove of garlic
1 tsp English mustard
1 tbsp wholegrain mustard
2 tbsp capers, rinsed
Salt and pepper

1 - Boil the potatoes, drain and keep aside.
2 - Heat the olive oil in a large non-stick frying pan. Season the mushrooms then cook on each side until golden brown, approximately 5 minutes each side. Set aside on kitchen paper.
3 - Blitz the green sauce ingredients in a food processor or roughly chop the whole ingredients then stir in with the wet ingredients in a bowl. Taste - it should be balanced, not too much lemon or capers. As a classic green sauce has anchovies, ensure it is seasoned with a little salt.
4 - Coat the hot potatoes in the green sauce. To serve, pile some potatoes onto a late, tuck in a few mushrooms then scatter over some rocket. Serve with a wedge of lemon.

Popular Posts

Wholemeal, Oat, Walnut and Seed Loaf

This is a simple, no-knead loaf that reminds you of the classic German rye breads such as pumpernickel. So quite a heavy texture with plenty...